HOW TO DESIGN A PRODUCT WITH THE NEW MERCH MAKER™ APP
Sign In and Select a Product
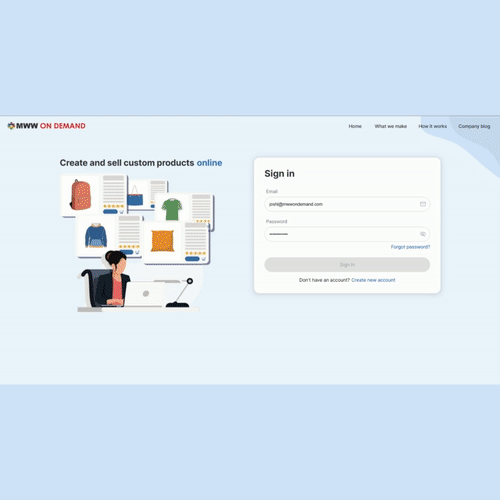
Sign in through our new Merch Maker™ portal with you Email and Password. If you have not already created an account, click HERE for account setup help. Once signed in, begin designing your product by clicking the NEW ORDER button, then the CREATE PRODUCT button on the following page, which takes you to our Merch Maker™ Catalog.
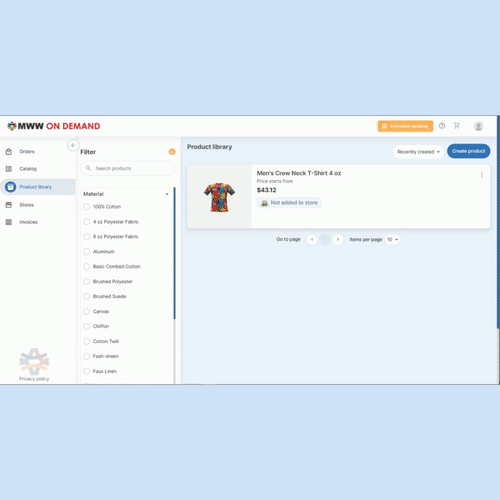
From the Catalog, you have the option of choosing from our four main categories of products. From their select a Category, then Subcategory, then you product item of choice.
Import Your Image
Once you have selected your product, you can now begin customizing it with your design! You will first have the option of selecting an image from your Library, or uploading an image from your computer. To upload an image, simply select ADD FROM COMPUTER and drag and drop your file, or BROWSE FILES directly in a Finder/Explorer window. Once your image has been uploaded, it will be immediately placed on the 3D render of the product you selected.
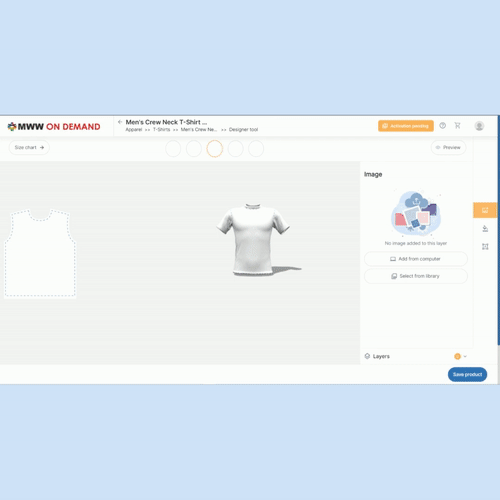
Apply Your Image to the Product
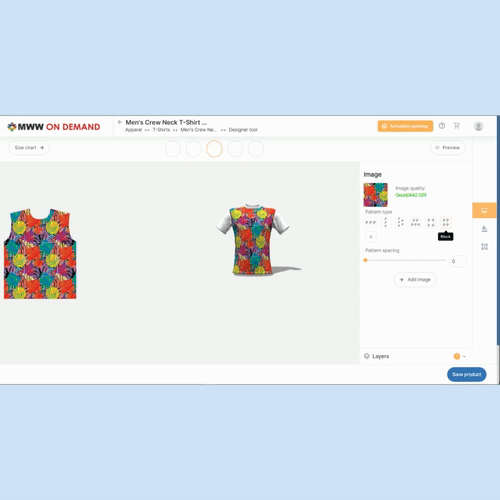
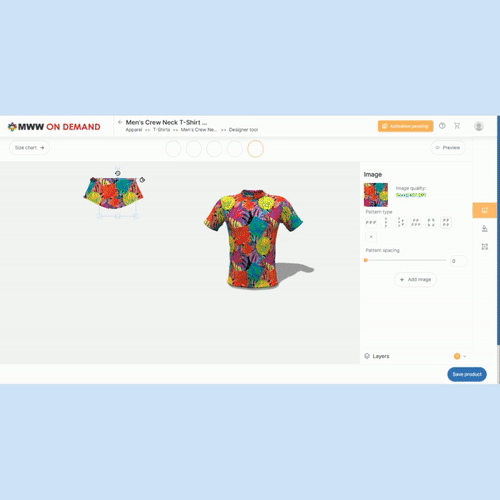
Once the image has been applied to the product, you now have the option to resize it, rotate it, reposition it, apply it in a pattern and even add other images in layers to produce complex designs directly within our Designer Tool itself! This is the opportunity to explore the various design options that our system has to offer.
When you are happy with the design, be sure to click through each of the product’s components above the rendering window to apply an image to each piece of the item.
Preview Your Designed Product
Once you have applied your design to each piece of the product, our Designer Tool gives you the option to Preview your product. Simply click the PREVIEW button, and check out the final renders of you product in the Designer Tool, or even download your mockups to view them on your computer.

Save Your Product and Select Variants
Once you are satisfied with your design, click the SAVE PRODUCT button. You will be prompted to select the desired variants for the product hat you would like to make available to be ordered. An approval box asking for verification that your design is correct and that you own the copyright or license for your uploaded images will pop up. Click APPROVE, or BACK if there are any edits or adjustments to make.
Add Product to Your Order and Submit
Once your design and product variants have been saved, you can now officially place an order! From your Product Library, you can now select your designed product, select the variant(s) that you actually want to order, and then the quantity of each. You also have the option of adding more products to your order.
Once all products and their variants and quantities have been added to the order, simply click PLACE ORDER, and that’s it! From you Orders screen, you have the options to View your order, Download a copy, or Cancel the order if needed.